


To view the Swimlanes in graphical view and to work with the swimlanes, do the following:
Click on the Graphical View tab.
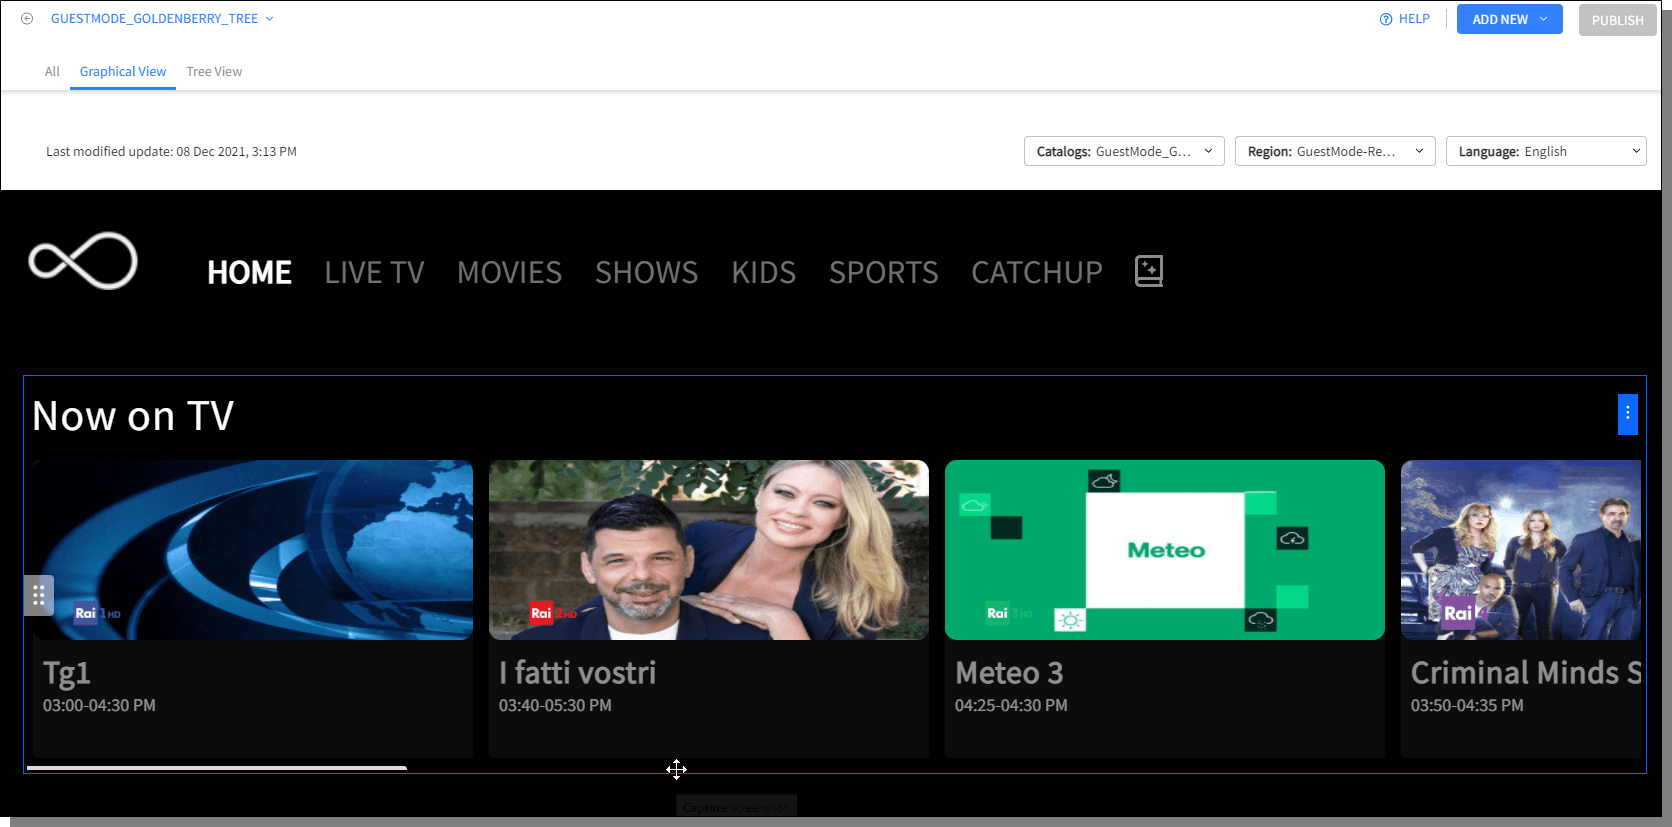
By default the Tree View of the first Catalog of the first Portal in the list is displayed.
To select a different Portal, click on the drop-down of the Portal names displayed at the left top corner.
Select the Catalog, Region and the Language from the drop-downs provided.

There are various categories of Swimlanes available, click on different tabs to view the Swimlanes under each category.
To initiate adding a new Swimlane, do the following:
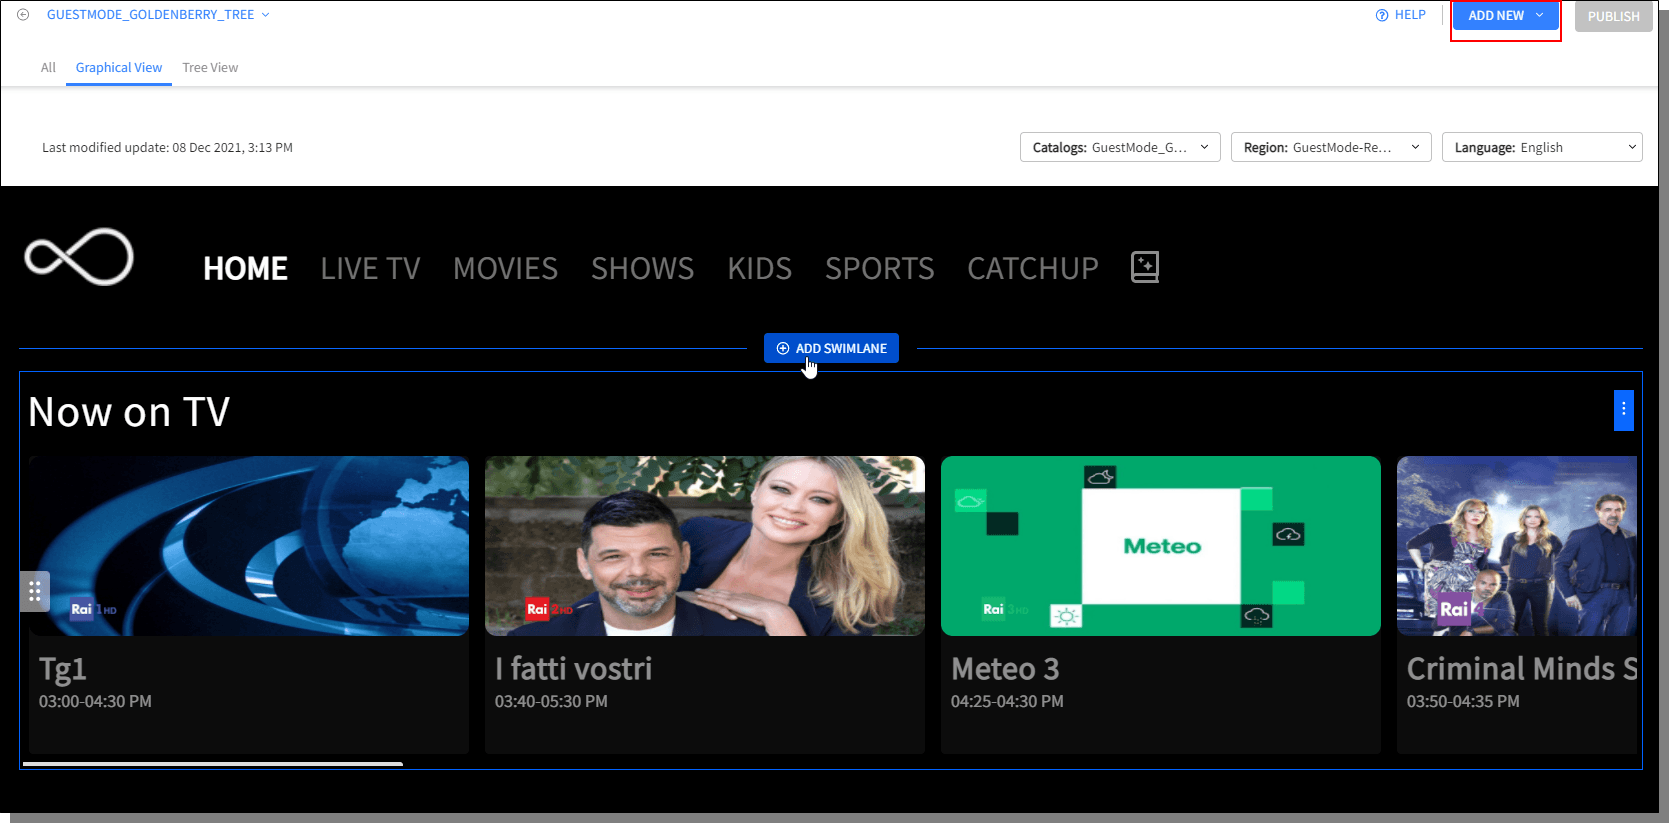
Click on the button on the right top corner of screen and select New Swimlane.

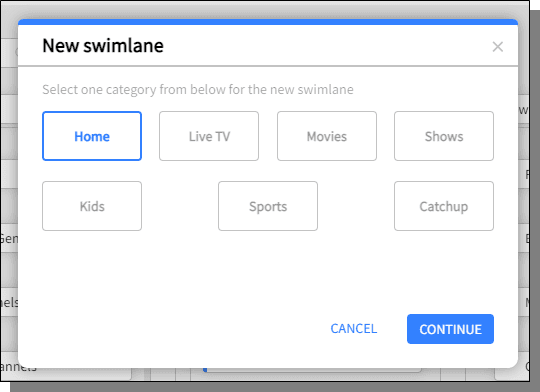
Select the Category to add the Swimlane and press Continue.
Adding Swimlane can also be initiated by hovering the mouse over the Swimlane border where the Swimlane is being added, click on the "+ Add Swimlane".
For details about adding a swimlane, refer to Adding a Swimlane
To view the options available to work on a Swimlane, click .

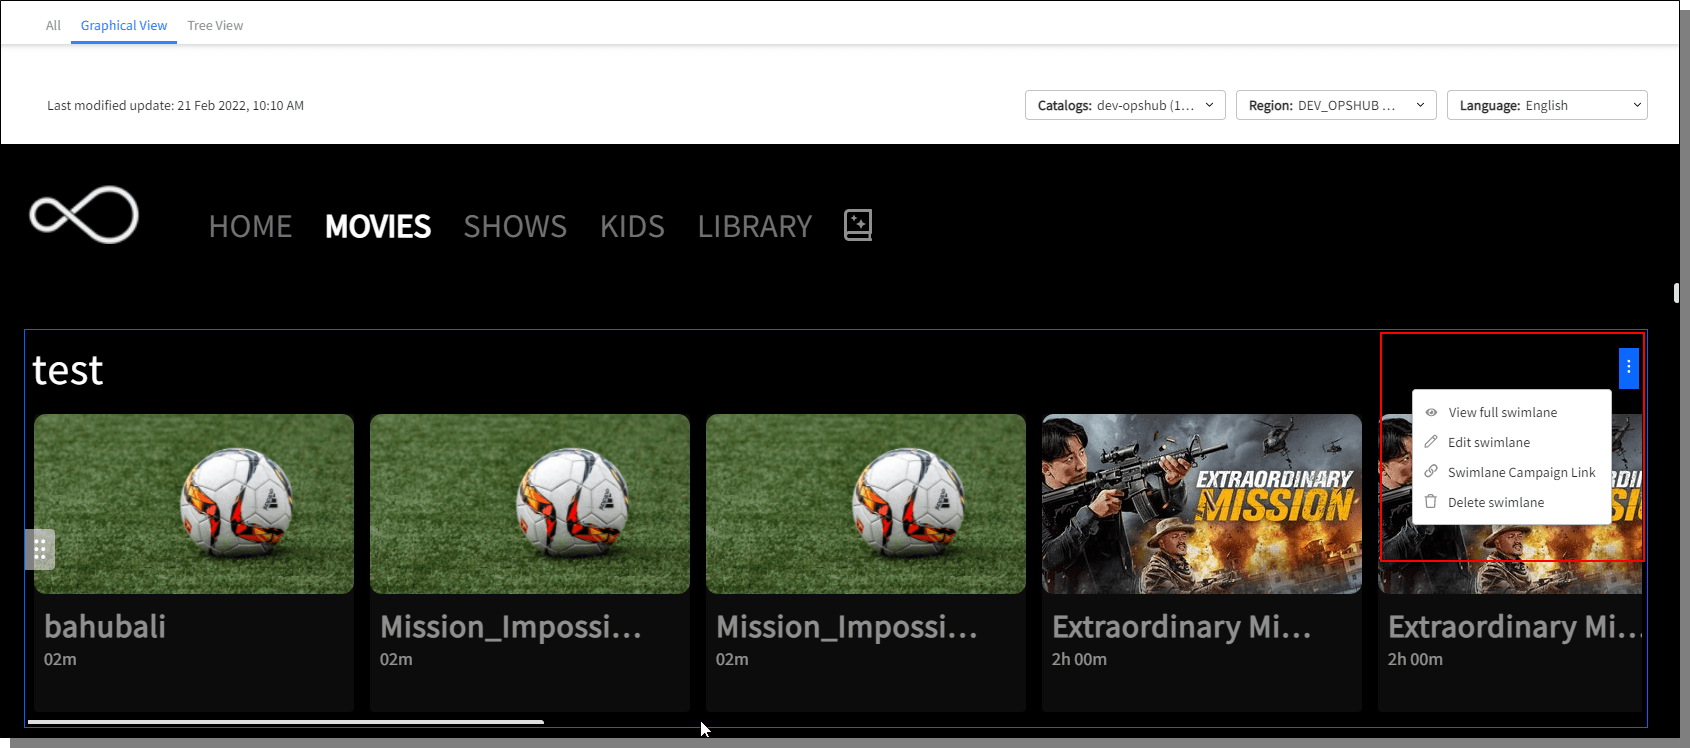
Choosing View Full Swimlane, displays all the assets in the selected Swimlane.
For details about Edit Swimlane, refer Editing a Swimlane
For details about Swimlane Campaign Link, refer to Experience Manager Campaign Link Functionality.
Choose Delete Swimlane to delete the swimlane.
To reorder the display of the Swimlanes, drag and drop the swimlane in desired order.
To initiate creating Campaign Link for the Category selected, click on the options button displayed on mouse hover on the Category menu.


