


The short video below walks through Genres: reading the genre list, creating a genre with its types and language details, editing a genre, and deleting one.
Genres are the categories used to classify content across the platform, such as Action, Comedy or Sports. Each genre has a unique ID, a display name in one or more languages, and one or more genre types that say what kind of content it applies to. Genres are used to organise content for browsing and filtering, and can optionally be grouped under "Top Genres" for legacy asset filtering.
The module is opened from the sidebar under System Config > Genres. The header reads "Genres".
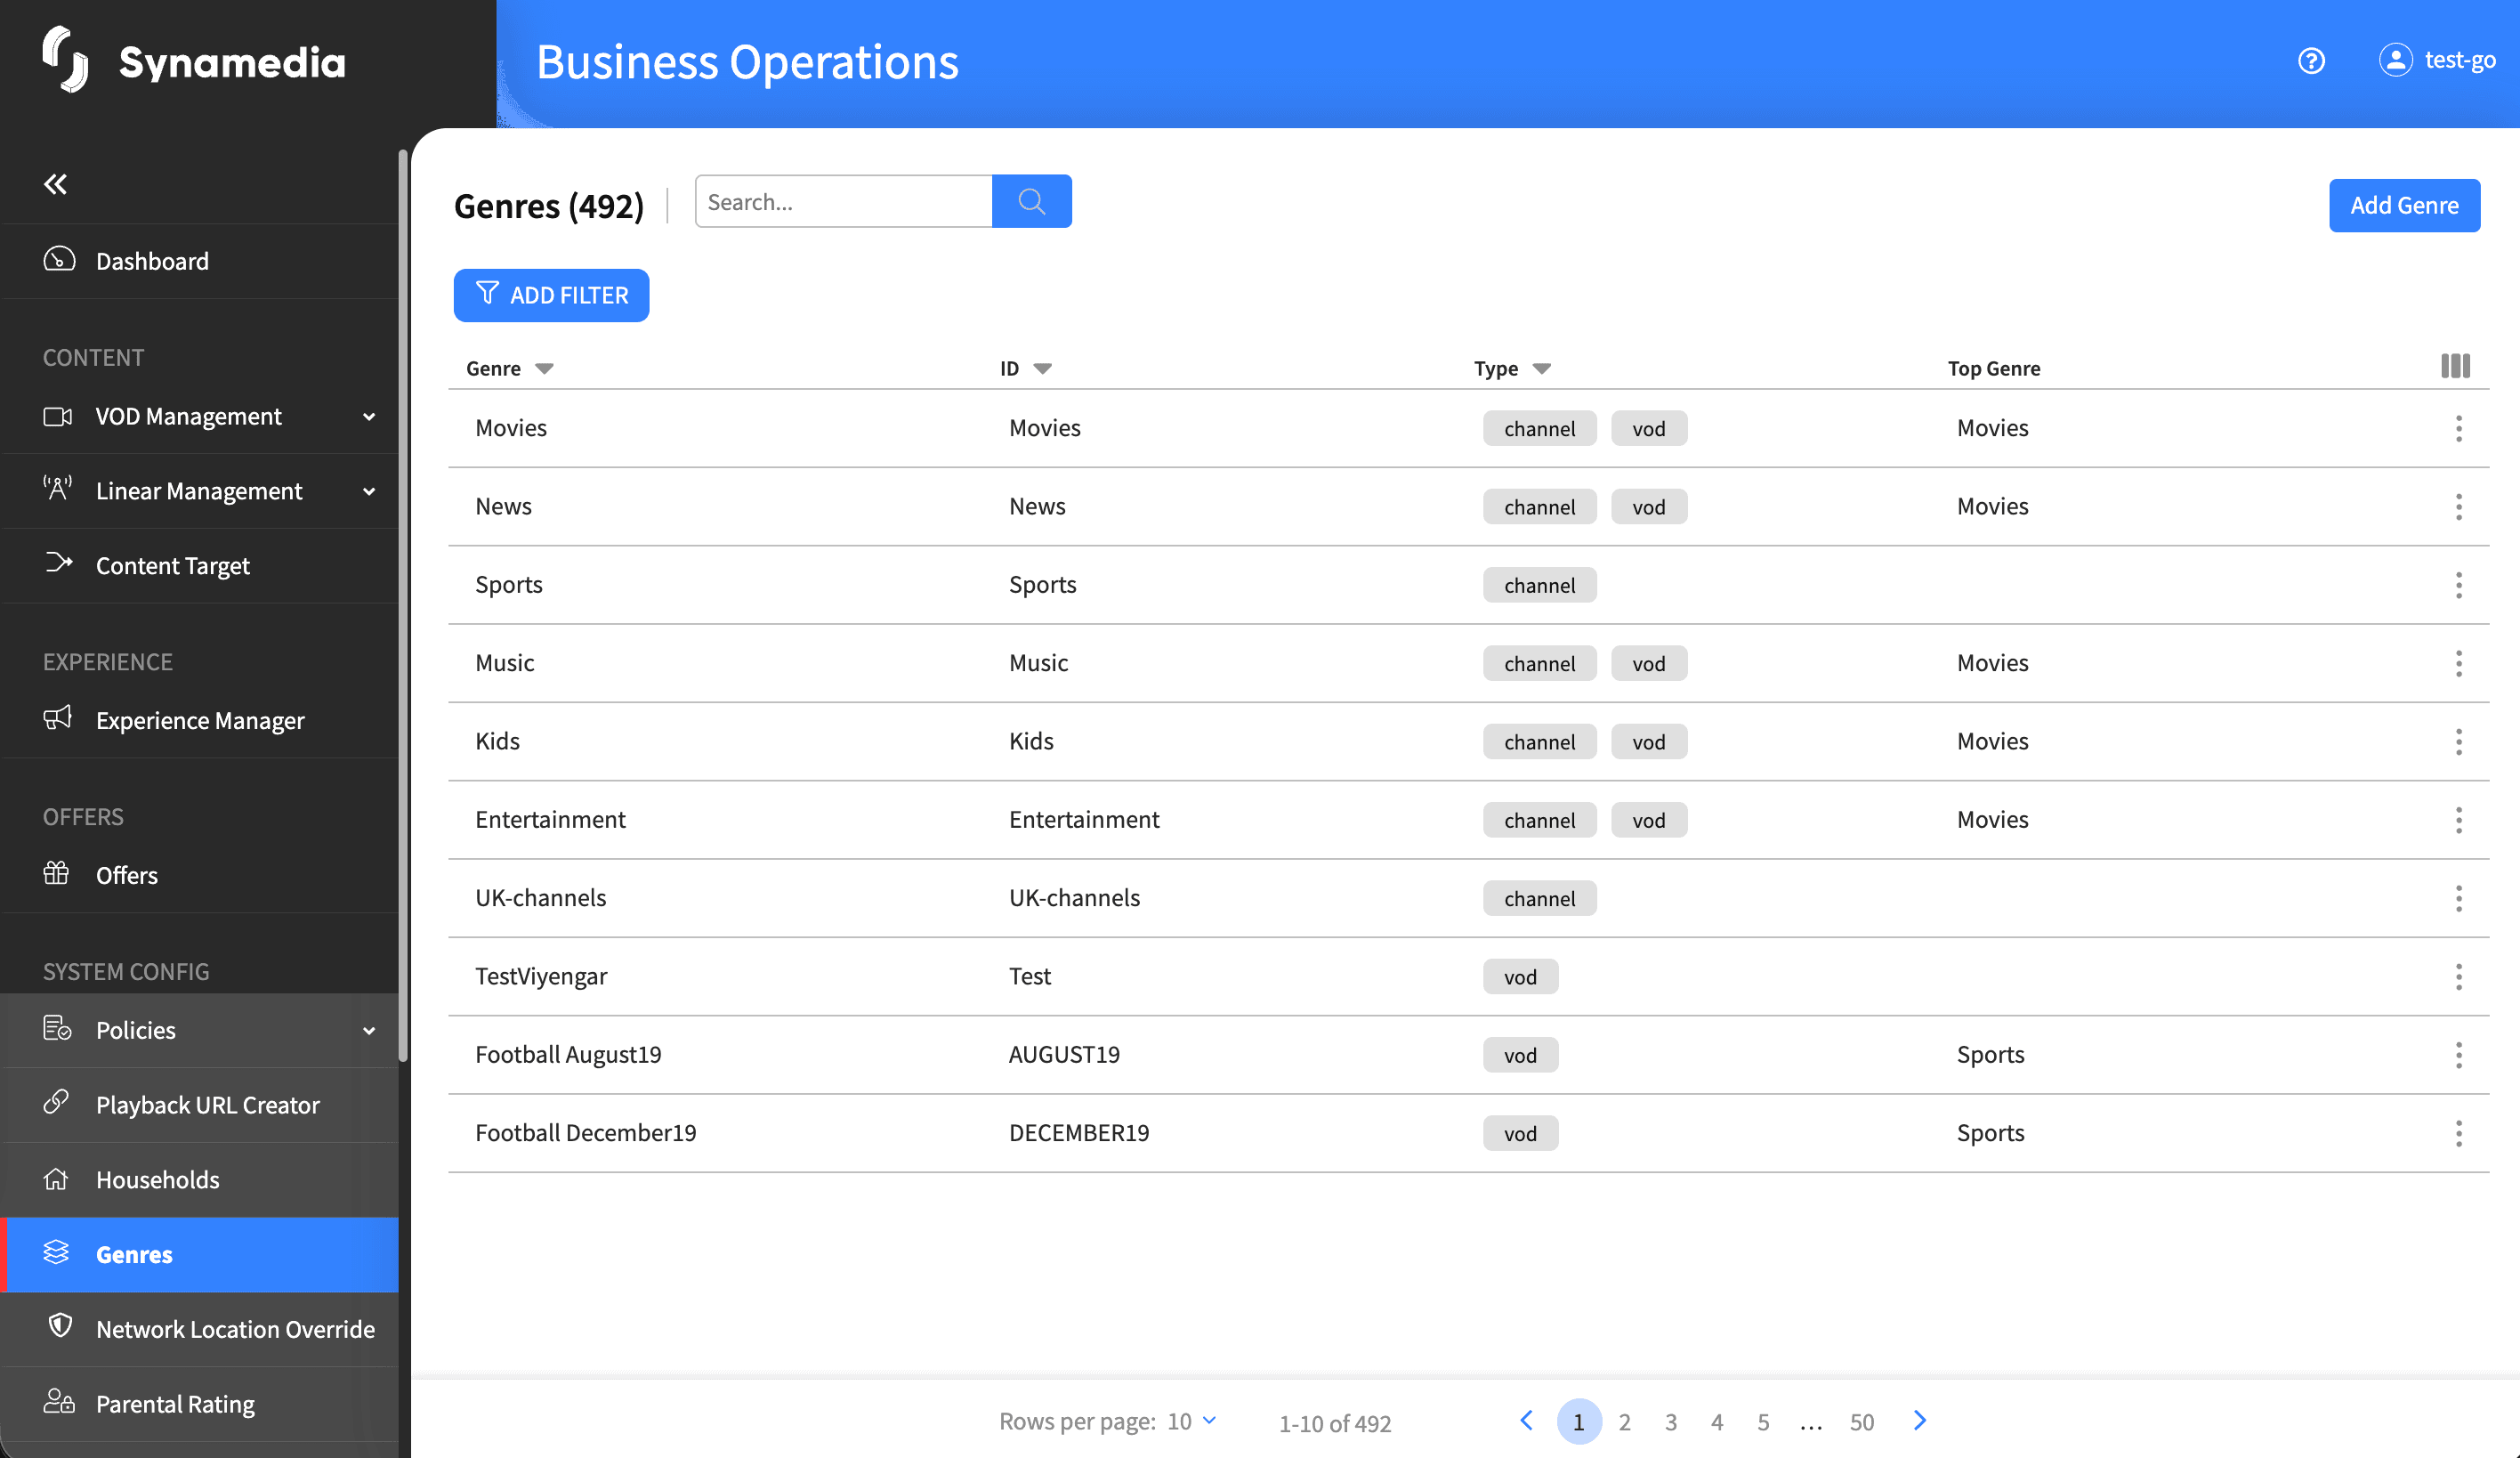
The list shows a row for each genre with columns:
Genre: the display name in your default language.
ID: the unique genre identifier.
Type: the genre type or types, shown as chips – VOD, Channel or Linear.
Top Genre: any optional Top Genre grouping assigned, used for legacy asset filtering.
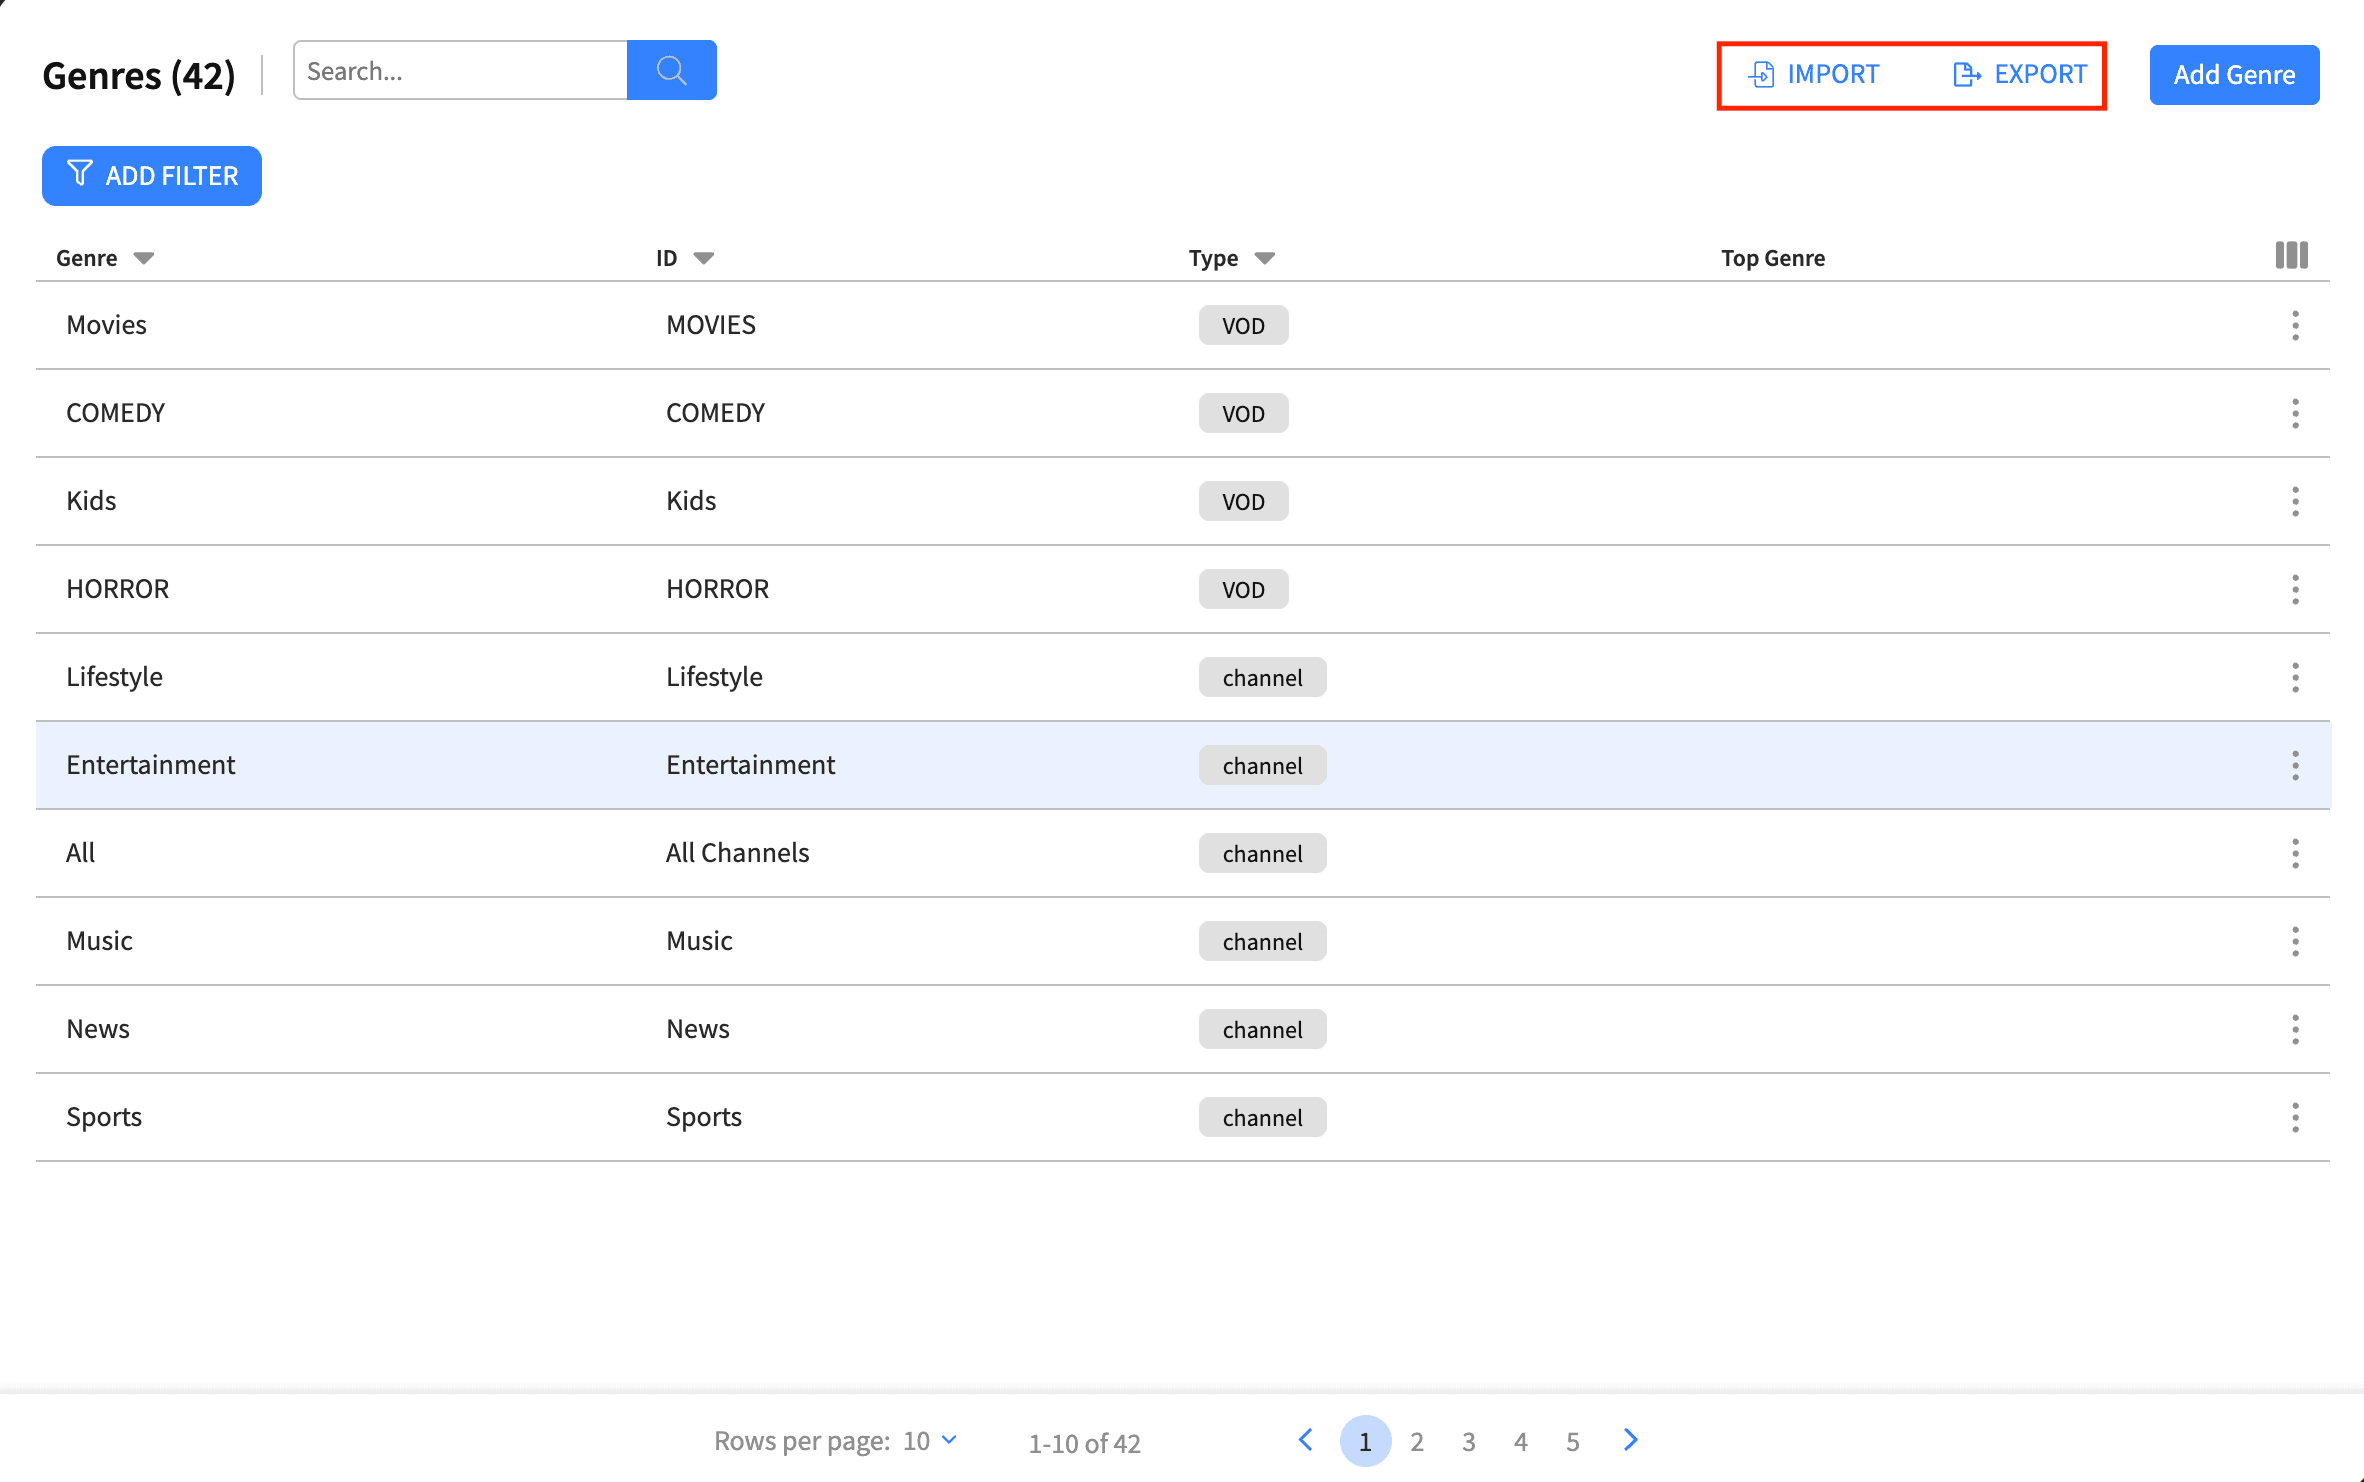
You can search by genre name or ID, filter by any column, and sort by clicking a column header. Where enabled, Import and Export buttons let you add many genres from a file or download the full list.
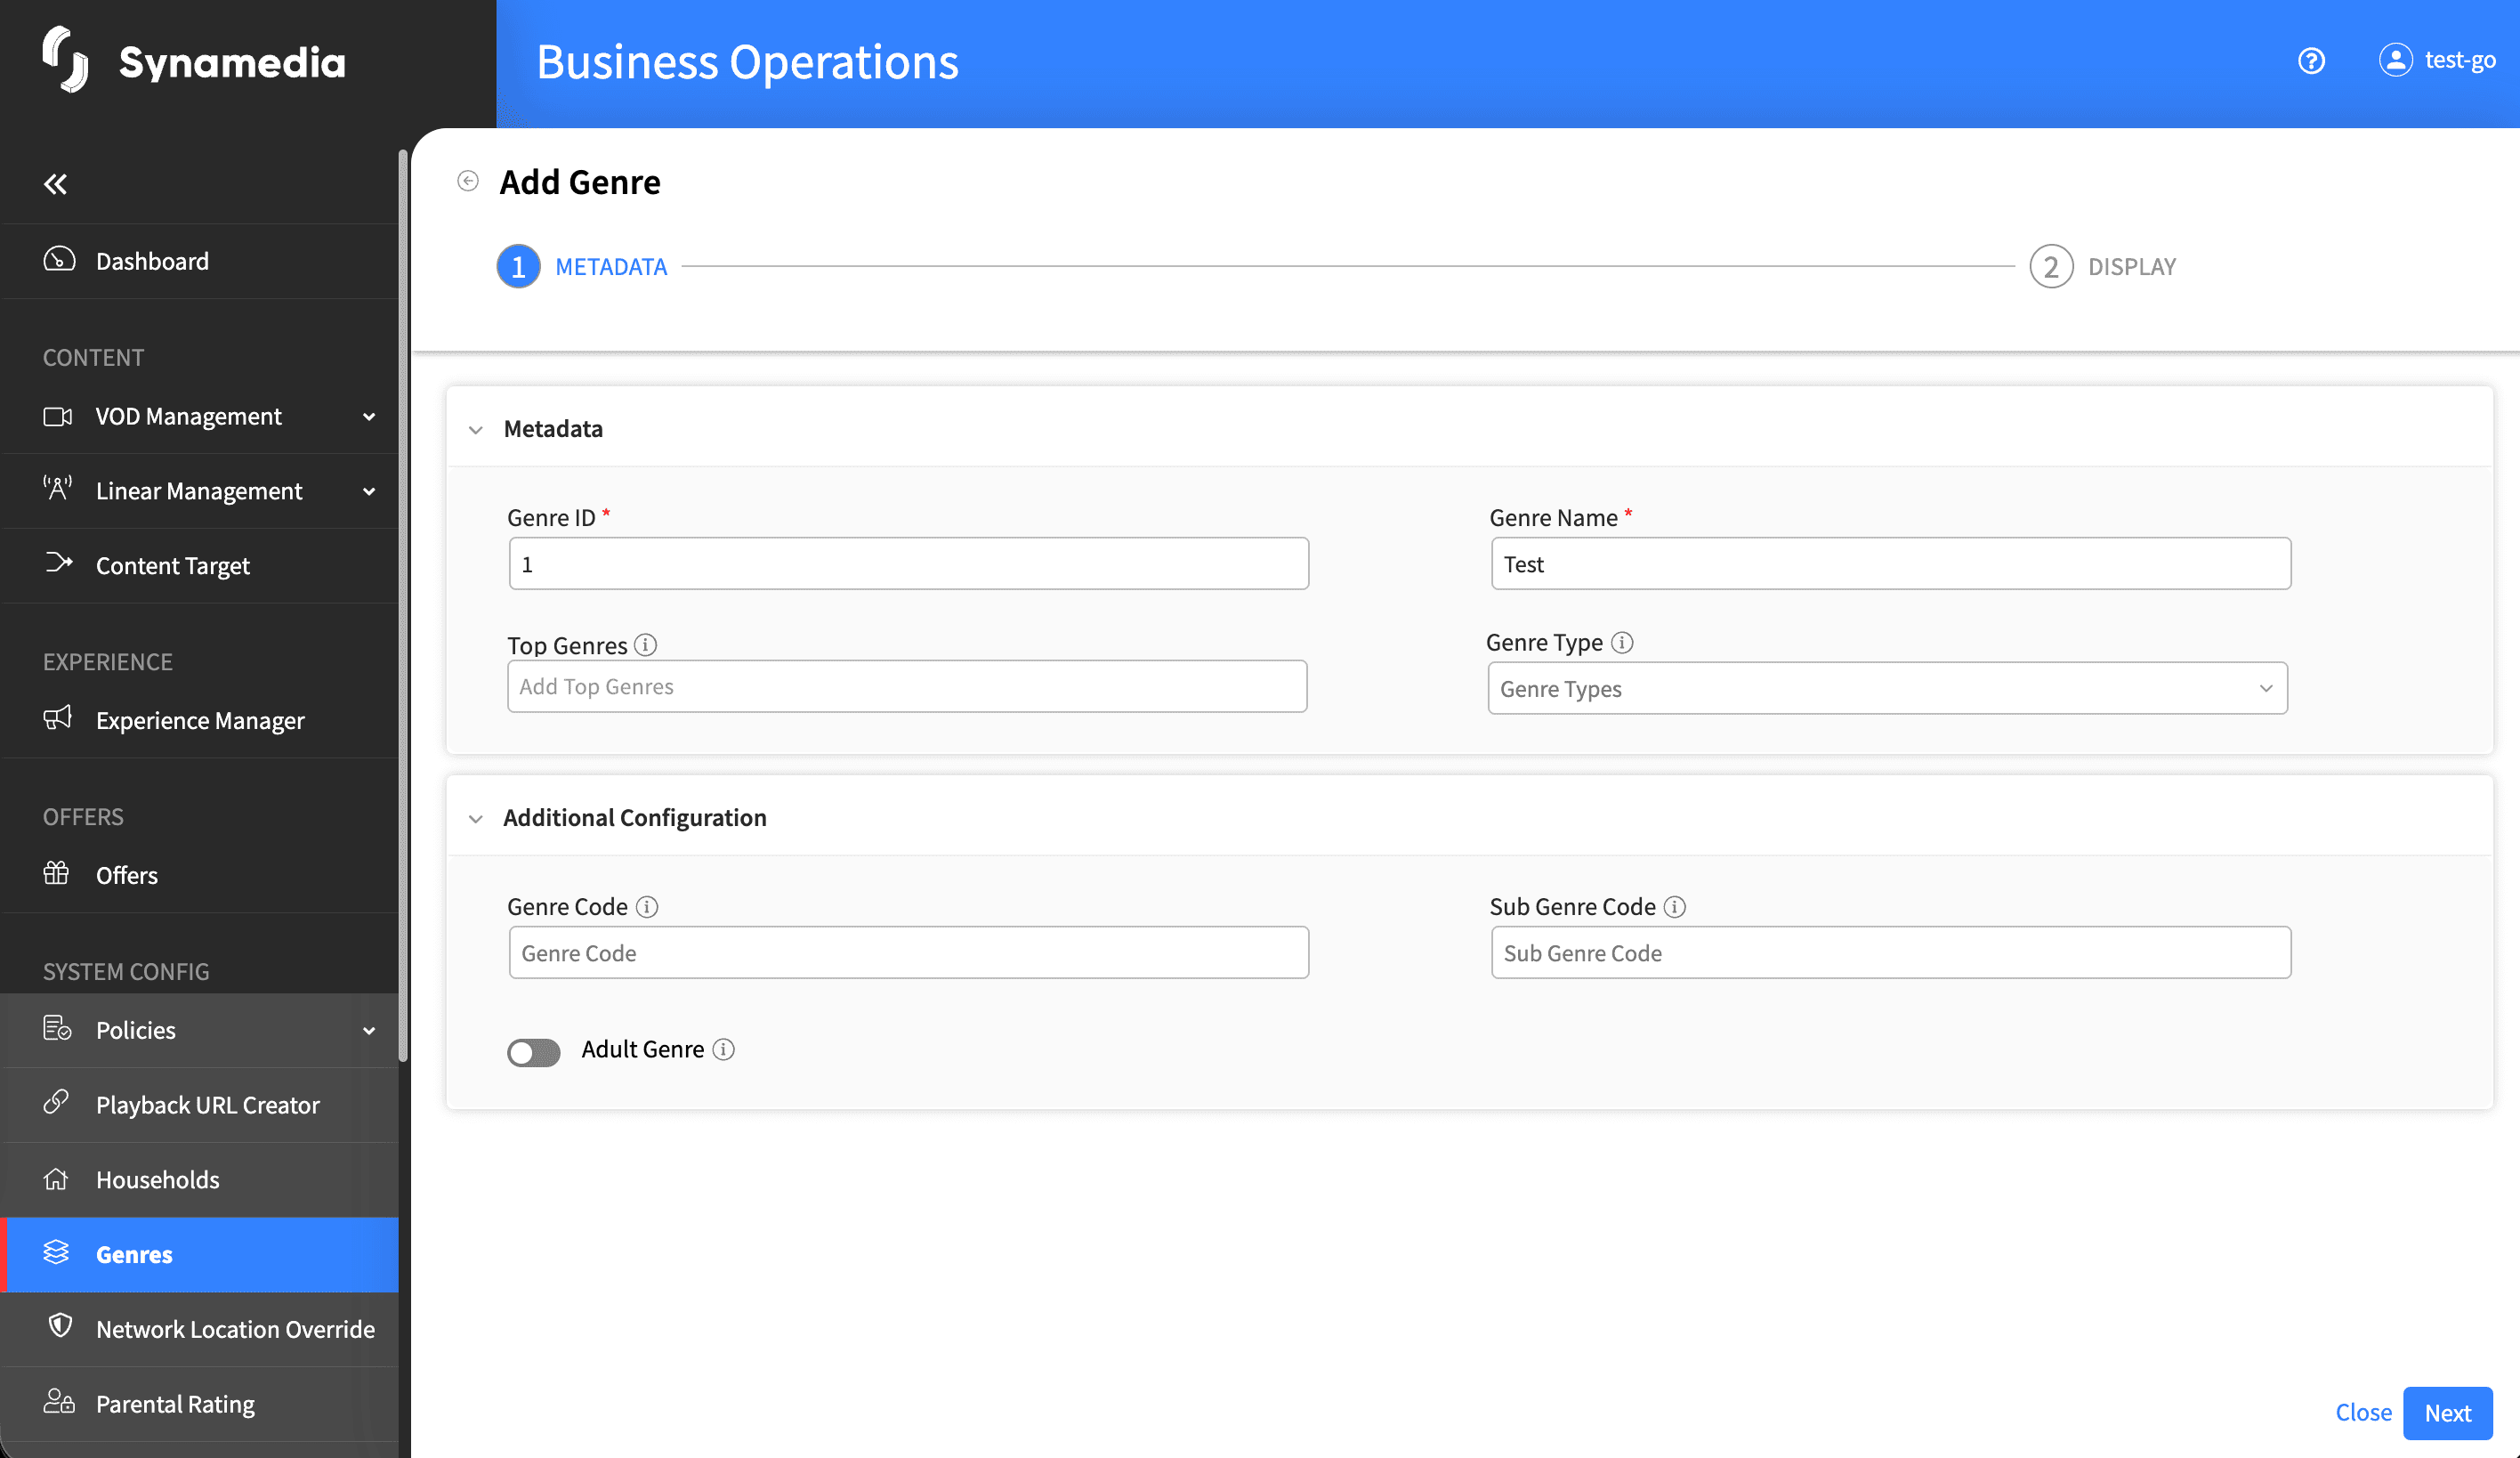
Click "Add Genre" to open the two-step form titled "Add Genre".
Step 1 – Metadata:
Genre ID: required and must be unique; this cannot be changed after the genre is created.
Genre Name: required, the display name in your default language, and must be unique.
Top Genres: optional grouping used for asset filtering in legacy systems; accepts multiple values.
Genre Type: choose one or more of VOD, Channel or Linear. Channel and Linear cannot be combined; if you select both, the message "Channel cannot be combined with Linear. Please select other combinations." appears.
Genre Code and Sub Genre Code: optional identifiers used for legacy system integration.
Adult Genre: a toggle to mark the genre as containing adult-rated content.
Step 2 – Display: for each available language, enter the display Name (required for your default language) and an optional Description (up to 150 characters), and add Thumbnails (Focus, Unfocus and Logo images). If you add a description or thumbnail to a language, that language also needs a name.
Click "Create Genre" to save.
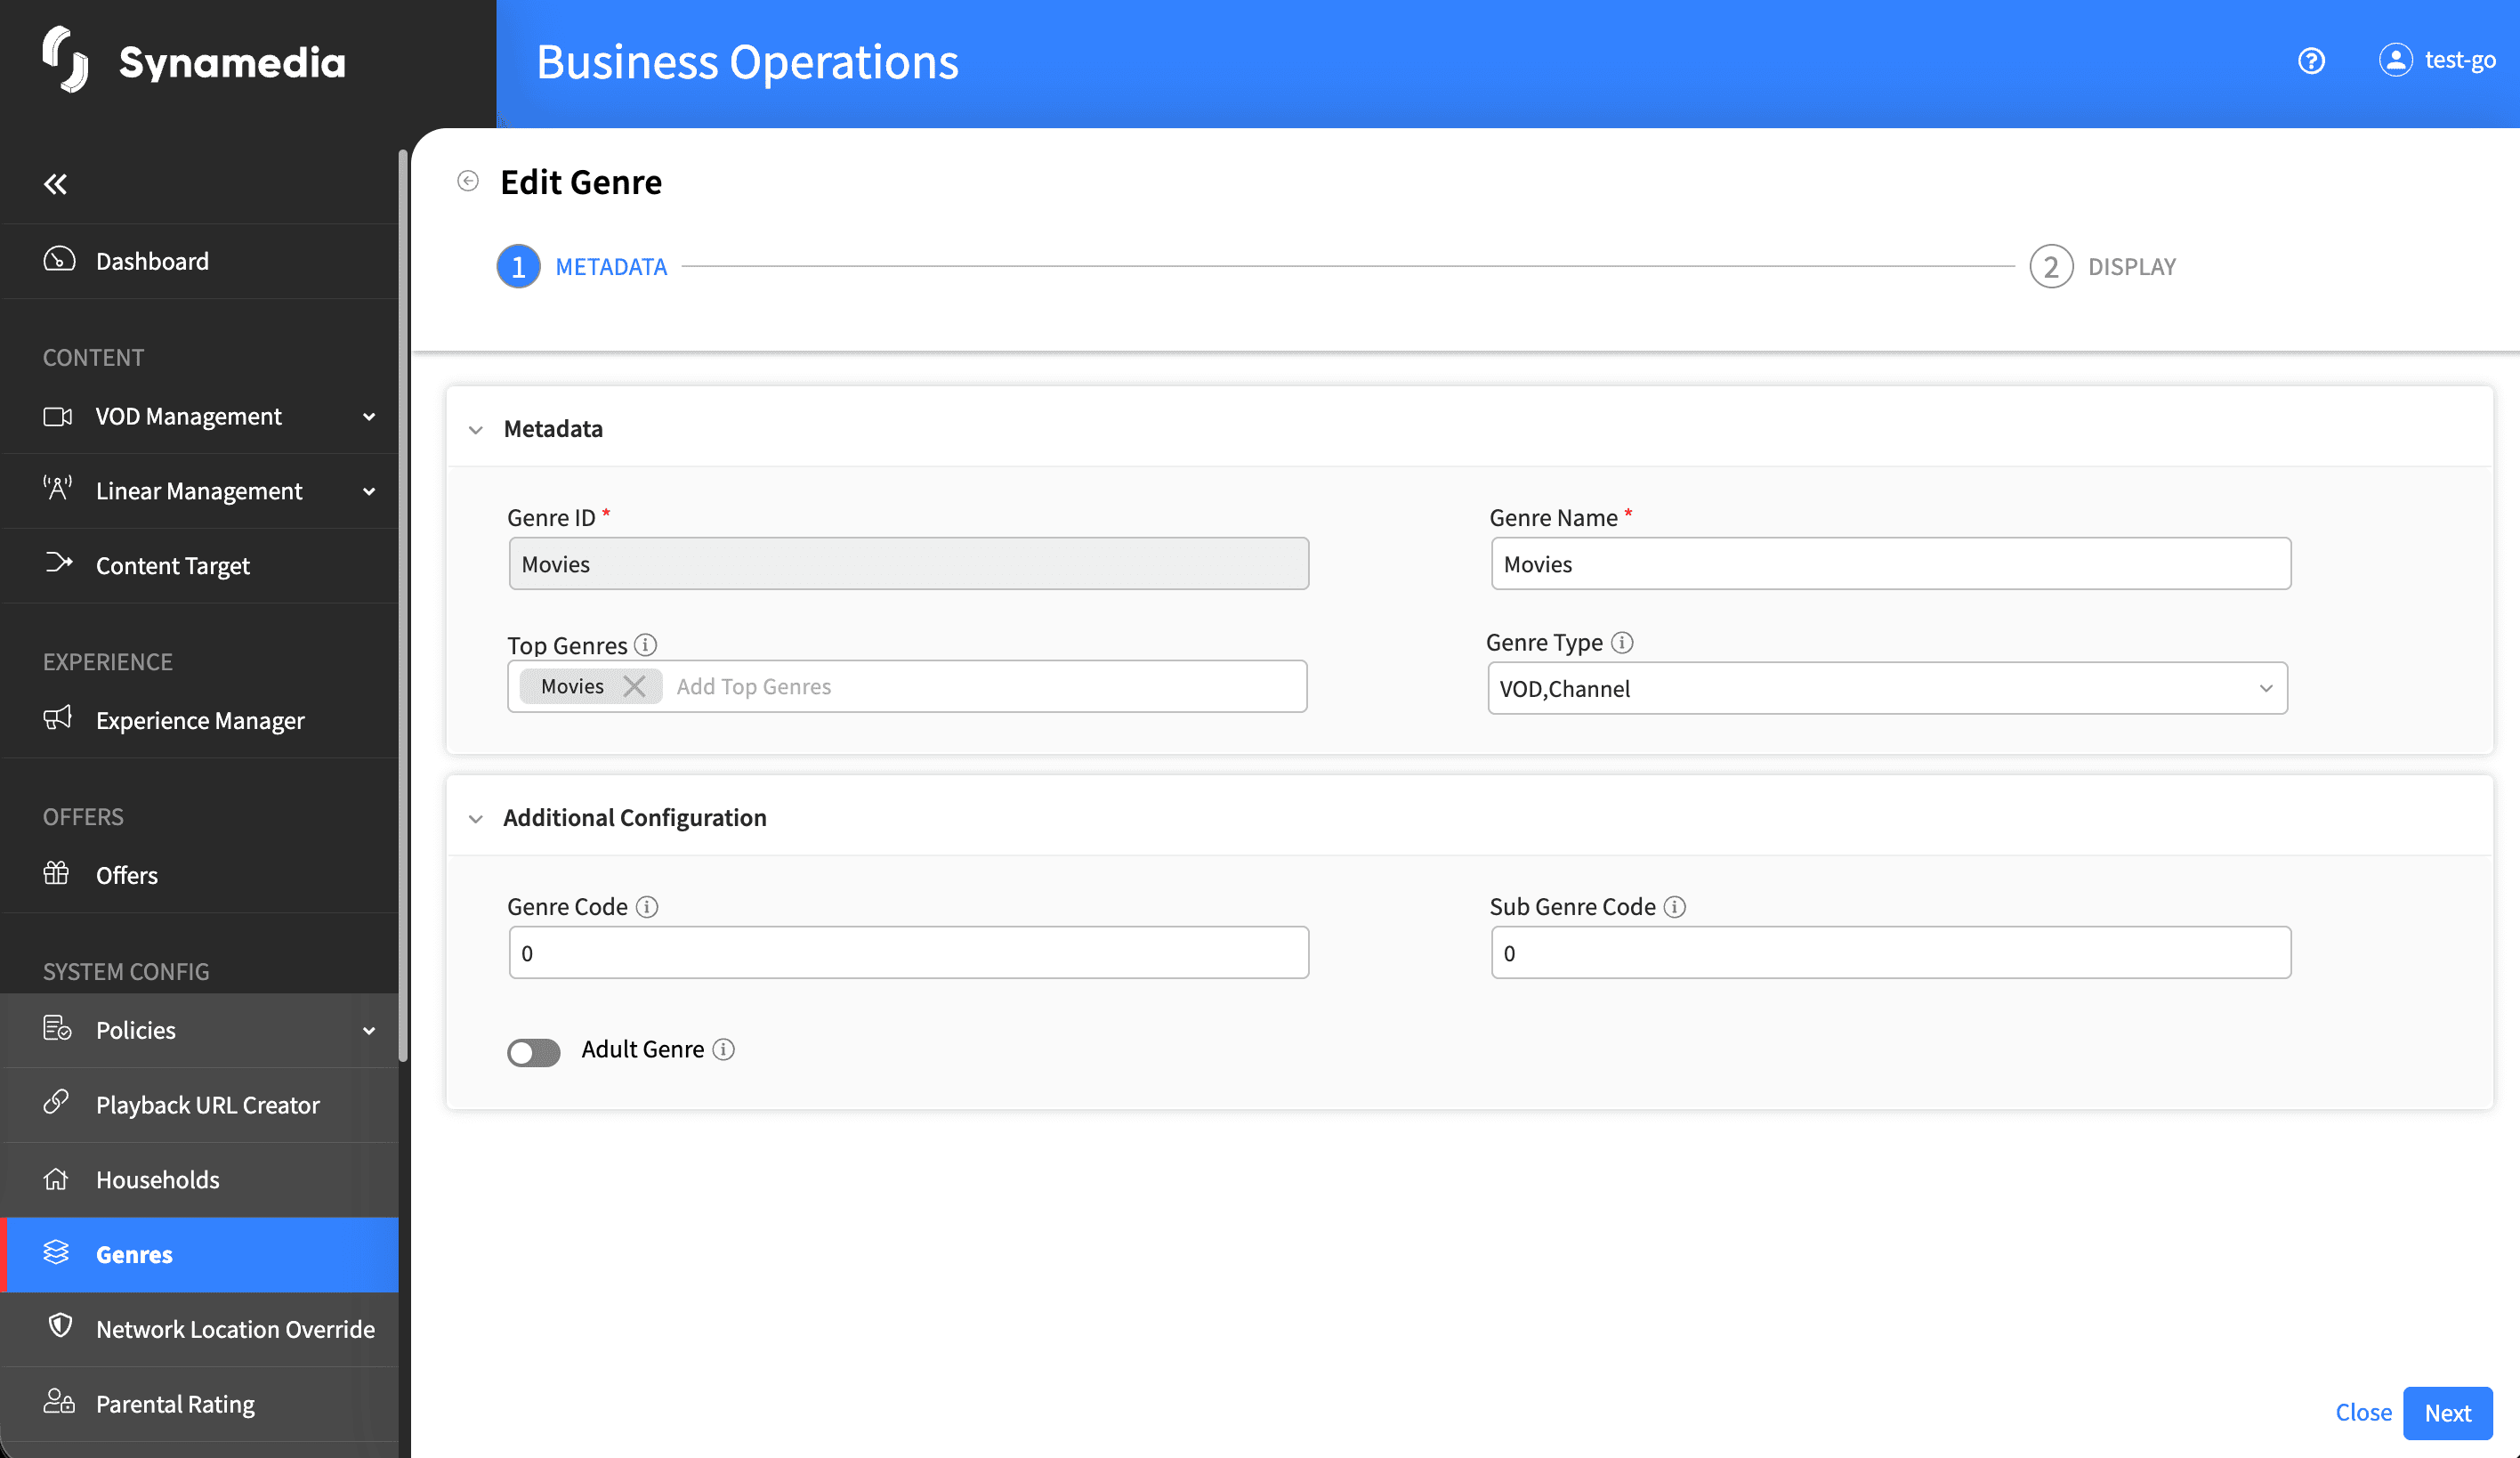
Open a genre and click the Edit (pencil) icon to reopen the two-step form. You can change all fields except the Genre ID, which is read-only once the genre exists. Save your changes when done.
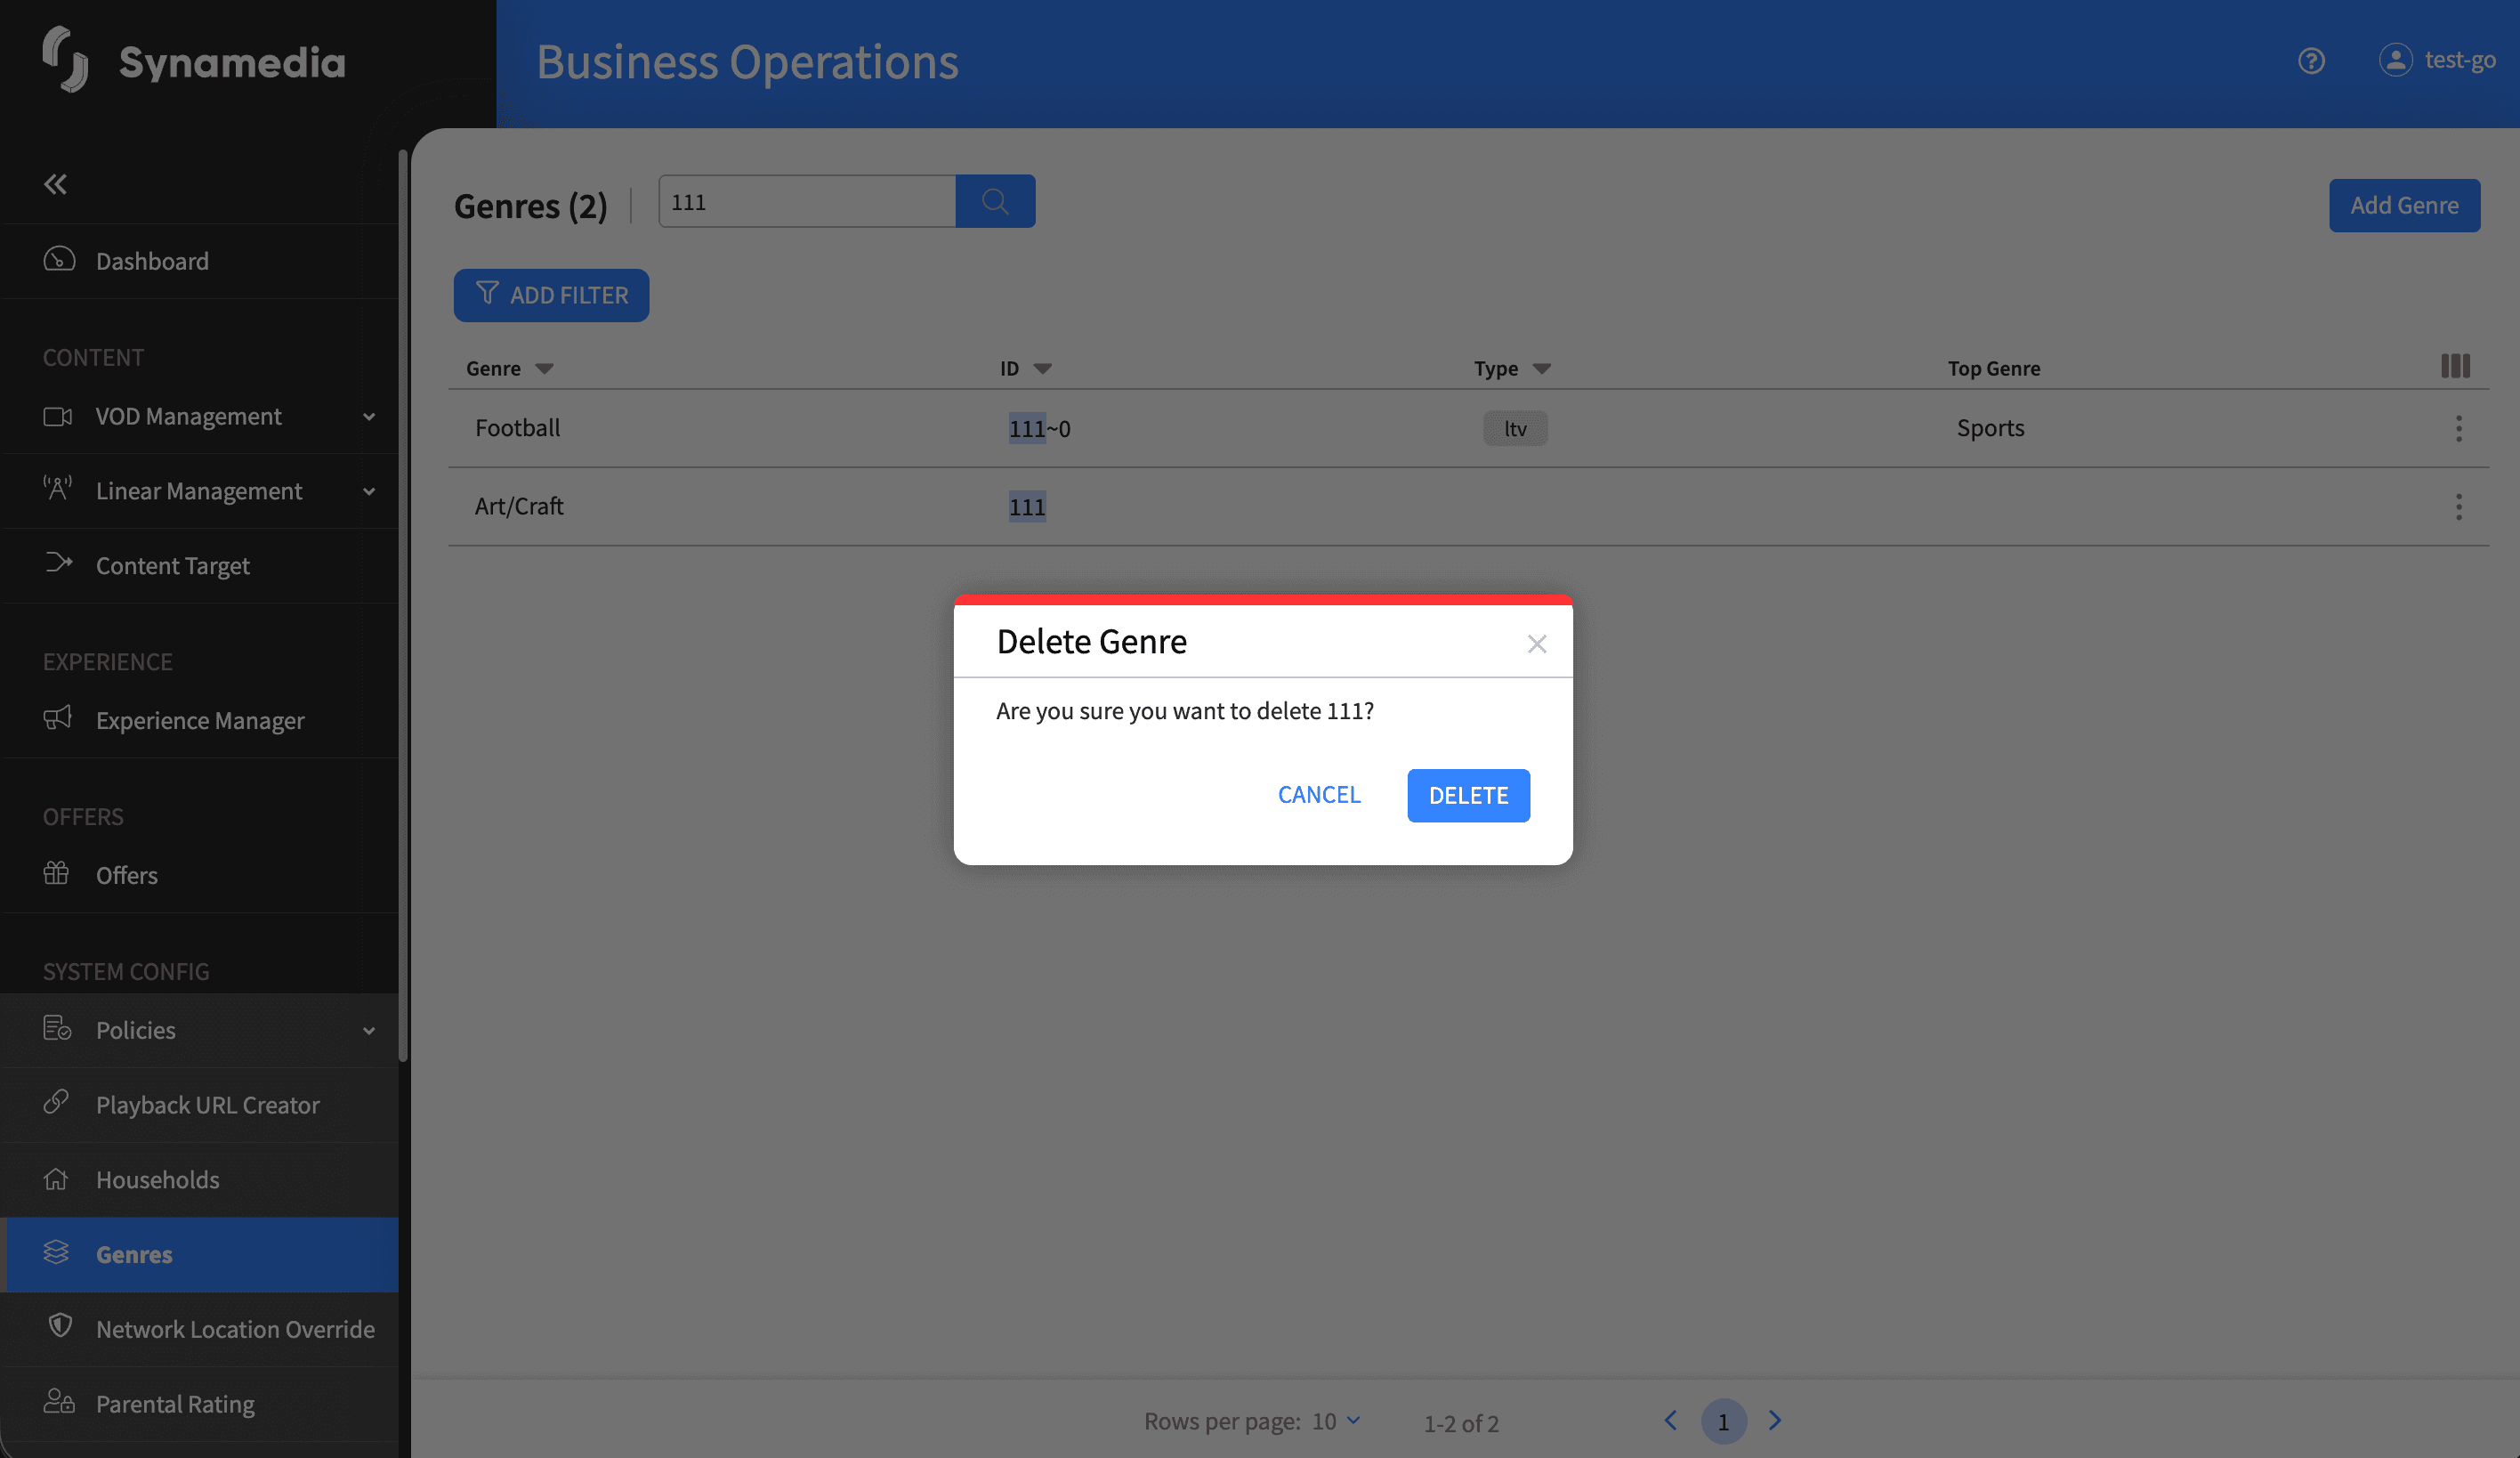
Click the Delete (trash) icon on a genre row. A confirmation dialog titled "Delete Genre" asks "Are you sure you want to delete {genreId}?". Confirm to delete.
The Genre ID is permanent once the genre is created, so plan it carefully or delete and recreate to change it.
Always fill in the display name for your default language; other languages are optional.
Channel and Linear are mutually exclusive types, so choose one or the other (or neither).
Use Top Genres to build the hierarchy that legacy systems expect, for example placing "Action" under "Movies".
Upload representative thumbnails per language so the genre renders consistently across clients.
Use Import to add many genres at once and Export to keep a backup of your genre list.

